

Tuesday, December 13, 2011
I found my inspiration
Tuesday, November 22, 2011
Hot Chocolate Stir Sticks
Okay, now y'all are really going to fall over. TWO recipes in one day? I know, I've outdone myself :). Actually, I saw these on Pinterest (sigh), so I made my own slightly different version. I took them to a fun Welcome Winter party last night, and they were a total hit, so I had to share! Here's the pin I saw from Good Housekeeping. Cute, huh? I know, and SOOO easy! 
But I like a little peppermint in my hot chocolate, and the straws seemed a little useless, so I did candy canes instead. Here's what you need: Candy canes (two dozen or so), large marshmallows (I used the regular large ones, not the ginormous ones, they don't look like they would even fit in a cup, but you could try them!), round nonpereil colored sprinkles, milk chocolate chips.

This photo uploaded sideways and I am too lazy to fix it, but unwrap your candy canes and shove them into a marshmallow as shown below
 melt your chocolate chips in the microwave in a small bowl according to the package directions (I only did about 1 1/2 cups of chips at a time to keep it from hardening before I had used it all). Pour your sprinkles into a small shallow dish.

 then dip directly (lightly) into the sprinkles
 and place on a cookie sheet lined with waxed paper to cool ( you can put them in the fridge for 10 - 15 minutes to help them set faster)

Arrange on a cute tray (they won't stand up because the candy canes are too heavy, unlike the straws, but they look cute laying down :)
 And serve with Stephen's Gourmet Milk Chocolate hot chocolate. Yes, if you love yourself or your friends, you HAVE to use Stephen's. Trust me, it's worth it. You can get it at some Costco and Wal-Mart locations, or on the Stephen's Gourmet website). No, they didn't pay me to say that :), it's just that good. Mix it up in your Cocoa Latte (also a must, it keeps it mixing and warm all day, LOVE that thing :), and serve at your Christmas/winter themed party.
 So cute, and SOOO delicious! The marshmallow and chocolate melts into the hot chocolate, making it extra rich and creamy, and the candy canes start to dissolve into it, giving it a peppermint kick. LOVE these, my kids are begging me to make more!
 ENJOY!

But I like a little peppermint in my hot chocolate, and the straws seemed a little useless, so I did candy canes instead. Here's what you need: Candy canes (two dozen or so), large marshmallows (I used the regular large ones, not the ginormous ones, they don't look like they would even fit in a cup, but you could try them!), round nonpereil colored sprinkles, milk chocolate chips.

This photo uploaded sideways and I am too lazy to fix it, but unwrap your candy canes and shove them into a marshmallow as shown below


Dip your marshmallow into the chocolate and spin until sides are covered


Arrange on a cute tray (they won't stand up because the candy canes are too heavy, unlike the straws, but they look cute laying down :)


White Chocolate Marshmallow Awesomeness Popcorn
Okay, I really have no idea what to call this, so there ya go :). This stuff is addicting. You have been warned. ALSO, don't fall over dead at the fact that I of all people am posting a RECIPE, ME, the lady who does NOT cook. Yeah, that should tell you how easy it is, pretty sure a monkey could make it, but seriously, amazingly yummy. I made this for parties last year and got tons of requests for the recipe. I will admit that it's not my recipe, but someone at my son's preschool gave it to me over the phone once and I have no idea who she was, so I can't give credit, and I tried to find it on the internet but couldn't, so this is my version of it.

- 2 bags microwave popcorn (less butter is better, I went with the natural simply salted (no butter), but you can do whatever
- 1 to 2 cups mini M&M's (or nerds, peanuts, toffee bits, chocolate chips, whatever)
- 2 to 3 cups mini marshmallows
- 1 (12 oz) bag white chocolate chips
- colored sugar sprinkles
PS - do you want to see what a clean and neat cook I am? Yeah, another reason I don't cook :)

And here is yet one more reason, my lovely, oh-so-happy kitchen helper :)

Okay, so pop your two bags of popcorn and removed all of the unpopped kernels. Pour them into the biggest bowl you have. If you don't have a ginormous bowl (I have had this bowl for a million years, I have no idea where it came from, I think someone left it in an apartment in college and I didn't know what to do with it so I kept it, I use it ALL of the time!) pour into two large bowls. You need plenty of mixing room (I made a batch prior to the photos, so ignore the messy bowl).

Mix in marshmallows, and sprinkle M&M's (or whatever you choose to mix in) on top

I forgot to take pictures of the next part, but melt your white chocolate in the microwave according to the package directions (usually 1 minute at 70%, then mix every 10 - 15 seconds until melted and smooth). Pour the melted white chocolate over your dry ingredients and mix (I use two spoons like tongs :) until everything is evenly distributed. This photo is only half, I had already moved onto the next step with the other half. Sorry! I get impatient!

Take half of your coated mixture and spread it onto a cookie sheet lined with waxed paper.

Sprinkle lightly with colored sugar sprinkles.
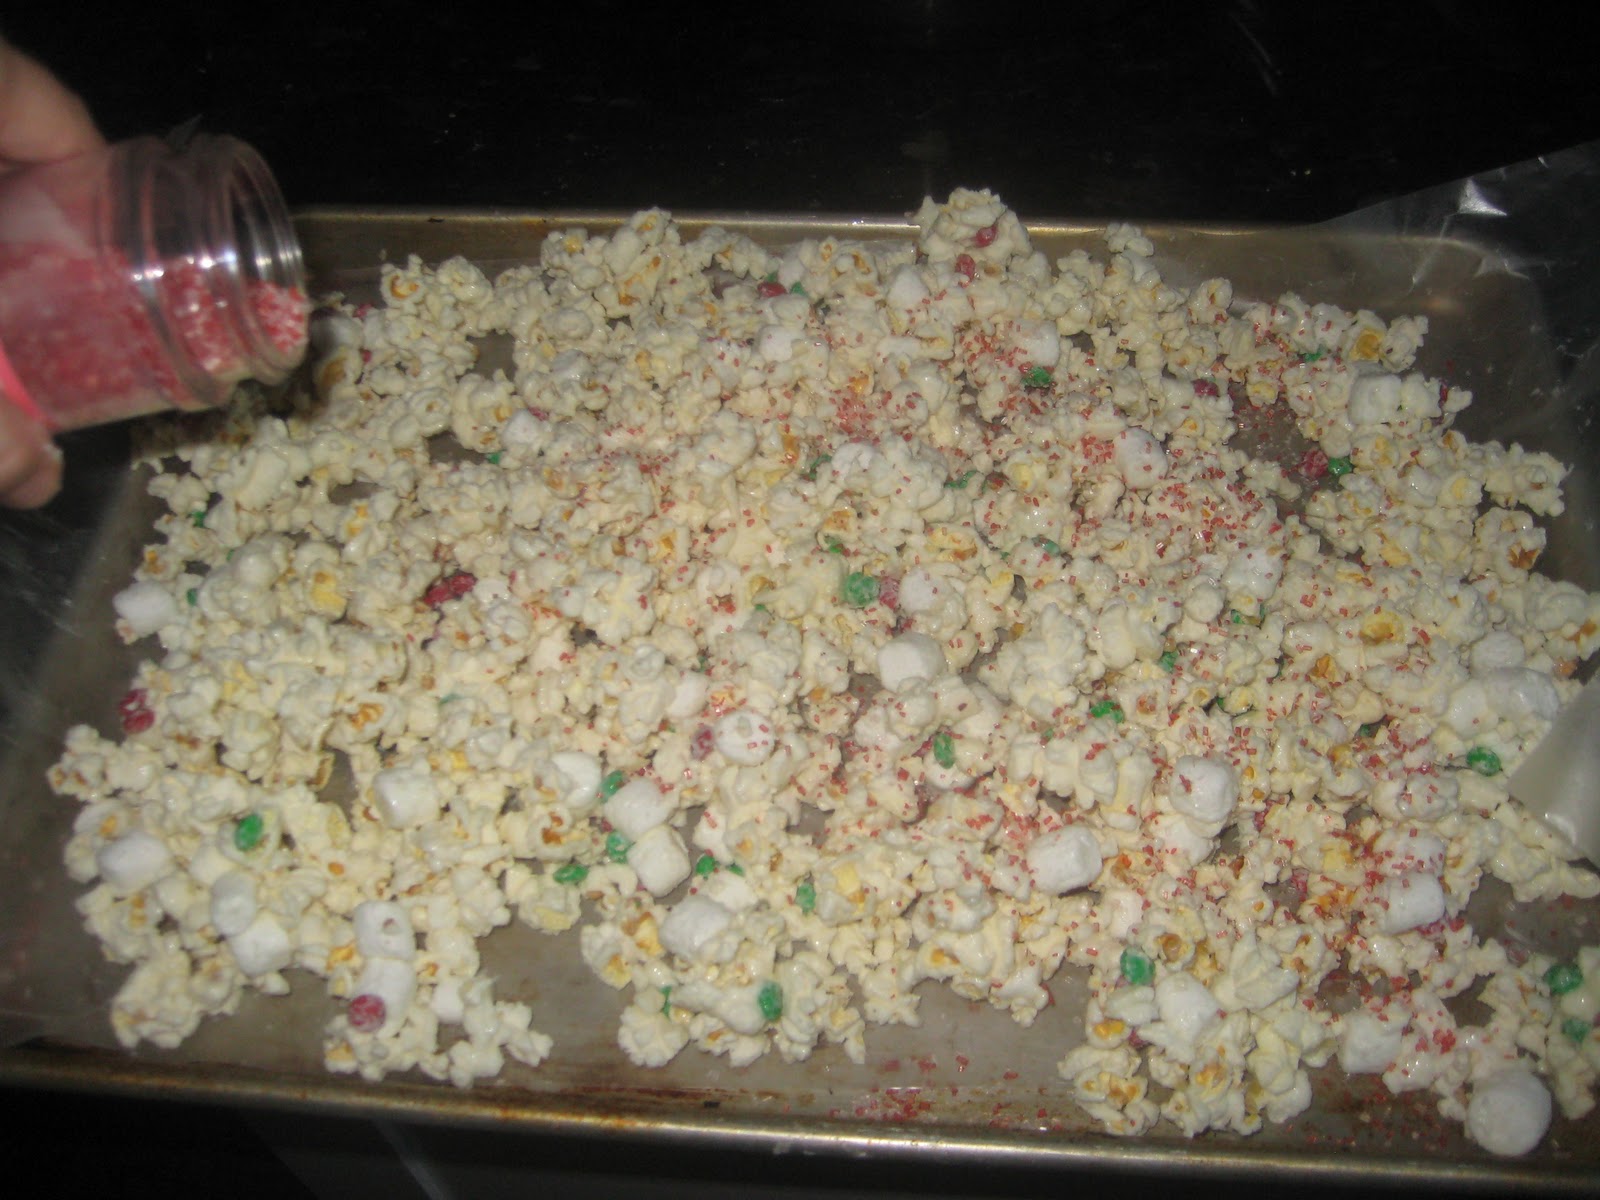
Pour the rest of your mixture on and sprinkle with more colored sugar. Allow to cool (you can toss it in the fridge for like 10 minutes to speed it up), break into pieces, and put in a cute bowl for your party (or in little bags for neighbor gifts, or eat it yourself :). Super easy, super fast, and it makes a TON! I honestly don't like marshmallows, and I still love this (you can use less marshmallows if you prefer, like 2 cups instead of 3)

Okay, so I didn't do the cute bowl part, my camera battery died, but you get the idea. Trust me, it's prettier in person, and to-die-for delicious! I have also done it for baby showers (use theme-colored mix-ins and sugar sprinkles, or sometimes I only mix in marshmallows, no M&M's, and then drizzle with pink/blue colored candy melts and pink/blue colored sprinkles for a baby shower or shower favors (I saw cute baby shower favor holders that said 'She's about to Pop' and were shaped liked popcorn containers at Hobby Lobby). Anyhow, it's just a basic recipe, you can do whatever to make it your own. Enjoy!
Sunday, August 21, 2011
Back to School
Sorry I have been MIA lately, it's been BEYOND crazy around here! The house is about 2 weeks (fingers crossed) from being completed - which means massive amounts of finishing touches and projects for me! Also, since we didn't quite make it in before school starts, I will be commuting 45 minutes each way to my daughter's school every day. Joy. Anyhow, I don't promise much in the coming weeks, but once we are moved in and the Crap Room is filled with all of my crafty crap, it's on. Here's a quick one I had to throw in because it's easy and cute :)
I bought these super-cute Pottery Barn Kids backpacks and lunchboxes at DownEast Home during their tent sale this summer for really really cheap. I mean REALLY cheap. The lunchboxes were $1.49 and the backpacks were $3 - $5. Seriously. I couldn't NOT buy them.

The only problem is that, well, these aren't my kids' names. Not even close. Well, I bought them in July, left them in the shopping bag, and tossed them in the garage where I sort-of forgot about them. Until last night, when I realized school was starting in a few days and they still had the wrong names on them. With all the chaos lately, I decided to not bother picking out the stitching (not sure if it works, but I have heard you can), and just go for a quick easy cover-up.

Here they are, all labeled (with the correct names) and cute!

Since I was throwing them together late at night and in a hurry, I forgot to take step-by-step photos, but here's the run-down (they were easy!). I cut pieces of white fabric (I used a cotton-twill, or you could use a canvas, you want it to be thicker fabric to cover up the monogram behind it) just large enough to cover the names behind them. I zig-zag stitched the edges of the fabric (I don't own a serger yet, but if you do, that would be easier and look better :). Then, using THIS lady's instructions (see the link on the right side of her blog to download directions), I cut heat transfer vinyl (purchased from HERE - I don't have the color names that I used, they were scraps from my vinyl stash) with my cricut using the Plantin Schoolbook font (I sized each one on my Gypsy so that they would fit perfectly on the fabric tags), then I weeded out the extra vinyl around the letters, and ironed it onto my fabric 'tags'. For the girls I wanted to frill it up a bit, so I cut felt butterflies using THIS die on my cuttlebug. I then stacked the butterflies (they are the same size, I just pinched the top one in the middle before I glued it on to show the accent color behind it). I then attached them to the nametag with fabri-tac. Finally, I lined each nametag with fabri-tac and glued them right over the top of the monograms. See, told ya it was easy. You could also use THIS freezer paper stencil method for the lettering if you don't have or want to buy heat transfer vinyl (but I LOVE the vinyl!).

Finished product

Don't look TOO close, I didn't do a very good job zig-zagging the tags, but hey, it was late and I was just trying to get it done :). I also cut and zig-zagged blank tags of the same size to glue on the backside of each tag to cover up the back part of the embroidered monogram. Not really necessary, but I didn't want to see the old names when I opened up the zippered part of the bag either. There you go, cute monogrammed backpacks and matching lunchboxes for super-cheap! :)
DISCLAIMER: I promise my future tutorials will be easier to follow with step-by-step instructions, this one is a little rough :)
Thursday, July 28, 2011
I know I said never again... but...
I am kind-of debating doing THIS to my stairs. I know, I know, enough with the painted wood. But I can't help it, I just love it. AND I am a glutton for punishment :) Here are some fun ideas I have run across, we will see what I can talk the hubs into :)  I LOVE this!
 Gray would be cool
 we know how I LOVE this pattern :), although probably a little much on the stairs
 Again, LOVE


So fun and different!
More ideas HERE
up close and personal
Sooo... we underestimated the amount of floorboards we needed for the red floor by about 6 pieces. Guess what I did at 10 last night and 6 am this morning? Sanded, painted, and distressed those babies. Yep, that makes a grand total of 88 pieces. Just for the RED floor, let's not count the white floor. But I am done painting, and I have seen most of the red floor installed (minus the shorted pieces), and it's AWESOME! I will take pictures today, my phone was dead and my regular point and shoot camera was MIA when I was at the house :) WHILE I was sanding at 6 am, I thought I would give you a closer look at the floors (full tutorial coming). I wanted a really distressed look in this room. You don't have to distress them at all, or you could lightly distress the edges (like I did in the white room).

(above) not distressed

(above) edges distressed

(above) heavily distressed (I did the whole red floor like this)
And because I get impatient (and my kids have the stomache flu so I am stuck at home and unable to go take a real photo at the house) here is a photo the hubs texted me of the flooring installed. This is before glazing and sealing (and ignore all of the drywall dust), but it's just fabulous! And best of all, Little Man LOVES his new bedroom floor :)

Tuesday, July 26, 2011
red DISTRESSED (as in REALLY distressed) painted wood floors


They look kind-of pinkish mauve here, but they are red in person :)

I am going to distress them with glazing after they are installed (I want the glaze to sink into all of the crevices between the planks, making them very cool and distressed looking). The top of the this board is glazed, middle is just sealed with poly, bottom is just raw sanded. It was my test board, I wanted to make sure I liked my finished product before I put it on the floor. And guess what? I LOOOOVVVVE it!
Tuesday, July 19, 2011
pAiNteD wOoD fLoOrS sNeAk PeEk :)

Sunday, July 17, 2011
I'm FLOORED

PS - excuse the pathetic phone photo, believe me, the picture doesn't do it justice, in person it's even more amazing!)
Saturday, July 16, 2011
Putting up a front


Friday, July 15, 2011
Tooth Fairy Door?!? Why didn't I think of that!
 Seriously, there are some ridiculously creative people out there. This idea is AWESOME! I am totally doing one in Miss Priss's room... you see the tooth fairy HAS been complaining that it's hard to get under her pillow while she's asleep without waking her for the big magical tooth/money exchange. Her own magical door NOT under a pillow would be a welcome improvement... just sayin'... I'm trying to make HER life easier :) See the link for a detailed how-to, but the basically it's a dollhouse wood door (from your local craft store), painted cute and sprinkled with magic fairy glitter (if you so choose), and attached to the wall with Command strips (removable adhesive, found at WalMart in the picture hanging aisle). Attach a pouch or pocket of some sort to the wall behind the door or to the inside of the door for the tooth, and there ya go. The Tooth Fairy has her own little private space to go about her business. So cute!
Thursday, July 14, 2011
SUPER fun creative posts coming soon! Check back in August 2011!
I love all things creative and crafty, and I have decided to share my creations with the world - whether you want them or not :). We are currently building our dream home and getting ready to move, so start checking for crazy fun posts and ideas at the end of August 2011!
If you need me, I'll be here...
 Yeah, lovely photo of me, I know.
 I will be busy for awhile, painting all of these (this is only half of the white ones, then I have to start all over again and do the red ones). Oh so fun. Painting away in 100 degree heat (because I can only do it while the baby naps at 2 in the afternoon) in an undisclosed location...
 shhhh... I don't think I'm supposed to paint in here (don't worry, the door is open while I paint), but the garage is full of stuff and I don't have anywhere else to do it, and the POD hasn't been loaded yet :)
 My support crew :)
 My weapon of choice. After Sandy and I sanded down the fronts and edges of each. and. every. board. Over 100 total. I paint and sand each. and. every. board. with a 2 inch craft brush (supposedly you get the best finish with the craft brush...). After each coat I sand each board, then repeat 3 times. Then distress them after it's all done and dry.
 I used this paint in Snow White for the white boards, and I will use Brick Red for the other set. Photos of that to come (when I get to them :). I am doing painted wood floors in Miss Priss and the Little Man's rooms, something like this, but no pattern, just distressed painted boards. After they are installed I will seal them with floor sealant, and it should be awesome. You'll see (I HOPE!). Until then, if you need me, I'll be in the POD.
say hello to my little friend...
 Ain't she purdy? Her name is Sandy, and together we have covered some serious ground. It sure beats hand sanding and tons of splinters! PS - don't mind the fact that I have no makeup on, I'm sweating in 100 degree heat, and my 4-year-old is the photographer. Lovely. Welcome to my world! Sneak peak of my current project coming soon!
Subscribe to:
Posts (Atom)
